
On one hand where mockups and wireframes display the appeal of a design, similarly on the other side, prototypes display its functionality. It allows you to experience the design in the same way a user does. Prototyping is the final reality check. Although there are different processes available, but at some point of time, they all need to create some type of mockup. The process of prototyping is entirely different. With prototyping, you will have to sacrifice on interactivity. If you wish to have a design with a rich prototype, you just need to invest time in the process of coding.
UXPin Prototyping is a modern tool that allows designers to create prototypes. Apart from this, there are services that help you turn your designs into quick loading and fully interactive prototypes both for the web and mobile. So, if you are still using Photoshop, the tips given below will make prototyping much easier and faster.
Use of layer comps for prototyping
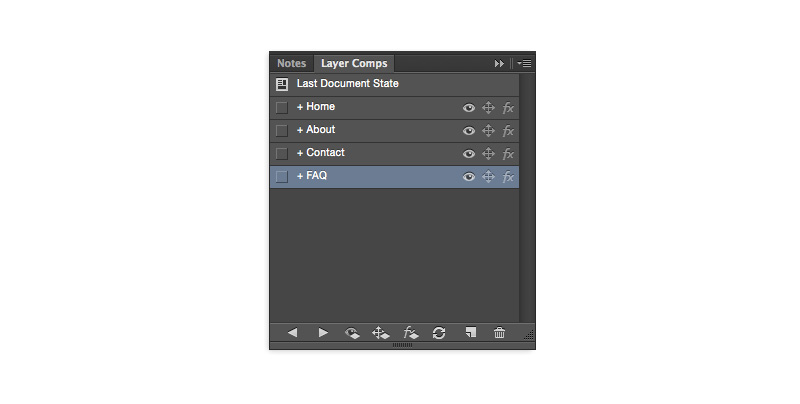
Layer comps function like shortcuts to the various states of your design. So, if a particular state has many nested layers, you can easily display it with a single click. This saves you from hunting around to toggle visibility or shuffle positions.
In Layer comps, you can export all the layer comps as images altogether. This eliminates the hassle to save each page and state of the design file.
It is quite easy to create layer comps in Photoshop. You just need to follow these steps:
-> Browse Window>Layer Comps
-> Go to Create new layer comp icon along with the name of comp
-> Select what you want to track
-> Click OK
-> Now repeat steps 1-4 with a new page of your design. This will create a quick list of shortcuts to various screens and states.
If you require making changes to any of the layer comps, just click the refresh icon.
Move an existing PSD for a web design into UXPin
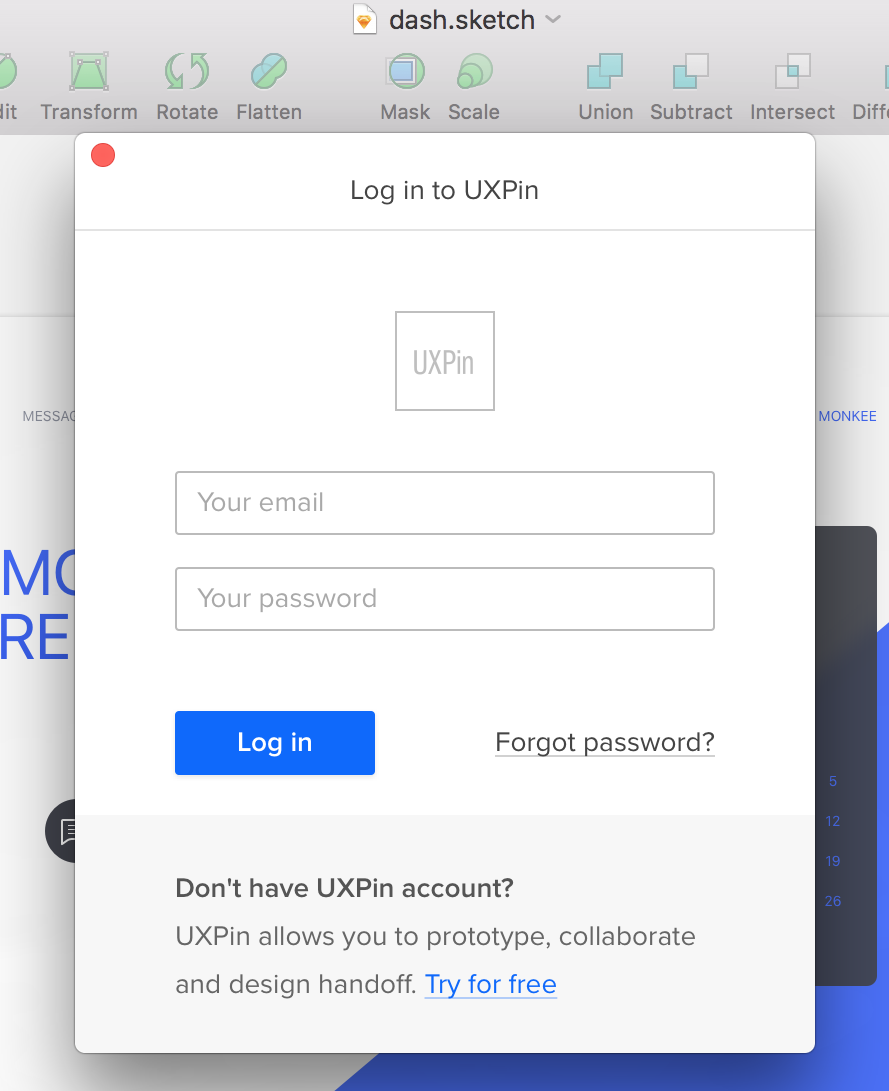

Log in to UXPin. Install the Photoshop plugin in bottom left-hand corner. Now, open PhotoShop. Click on the elements you want to export. Now, open File > Generate > UXPin Export. In this step, you will be exporting all the elements to UXPin. This ensures the ability to add interactions to the existing layers. This way the file will be exported to the desktop with a “.uxpin” extension.
Get back to UXPin to locate your project. Drag and drop the “uxpin” file into project view. The exported file will now be successfully uploaded in UXPin. Now it is all set to be turned into a prototype.
Whenever the file is browsed in UXPin, you will see that Photoshop layers have been preserved. Click and add some interactions. This is quite easy to do. Just click on an object on screen. Now click on “lightening bolt” icon to select the interactions.
To select the first interaction, click on “Interactions” button. A “link” button as a shortcut is available that allows you to link UI elements to the pages. You will also find a list named, “Recently created interactions”. From this list, you can quickly jump to any recently created interaction in your design.
The process of setting up interaction is a 3 phase process. First is selecting what should trigger the action, secondly, what type of action the trigger should initiate, Thirdly, what element should get affected by it.
Similarly, there are multiple ways of selecting the element that should be affected by interactions. Either, choose it from the list of elements or using crosshair to point out on the canvas.
UXPin allows you to choose from a large number of triggers, interactions and animations. Triggers include clicks, hover, mouse-in, double-click, page load, windows scroll and so on. Actions included in the same are show element, hide element, go to page, scroll element, toggle visibility, rotate element, change opacity, style and so on. Similarly, animations include ease in, ease out, fade and slide.
For every interaction, a time delay can be selected before it occurs. For precision, some interactions feature additional settings. For example: amount of pixels you want an element to move, total time an animation should last on.
Ending Notes!
So, this is it! It is a quick comprehensive guide to transform your flat PSD into a layered interactive prototype. Here, I have listed two different ways. You can opt for the one that is convenient for you. Try these and let us know if you get the desired results or not.
About Author
Founder
David Watson is the founder of DesignDrizzle and is a professional website designer for over 10 years. He has competence in creating visually appealing and user-friendly websites for all the clients. He likes to explore new and creative ideas for designing, photography effects and other inspirational subjects