

Google has finally decided to pull the plug on the Picasa in the favour of their very own photo app named as Google Photos. It was launched in April 2015 and is considered a strong contender for one of the best photo apps we’ve seen lately. The app offers is integrated with Google Drive and hence facilitates you to store your precious memories with guaranteed security.
After the advent of Google Photos, a lot of people started migrating to Google’s very own photo service. The reason was simple; Google is known for doing things the right way. However, people who were already using other services like Picasa were a bit confused as they didn’t know how to transfer their gallery over to Google Photos.
Lucky enough for them, the process is very simple. All you need is some basic level knowledge on how to handle things over the internet and you’ll be good to go. Let’s take a look at how you can transfer photos from Picasa to Google Photos.
Step 1: Download Required App
Download and install Picasa 3 from http://picasa.google.com
Step 2: Download your Photos
Now go to https://picasaweb.google.com/home
Once you’re there, you can easily download all the photos that you need to transfer to Google Photos. Make sure you download them in one place; this will make it easier for you to locate them and send them up to the cloud.
Step 3: Scan Photos for Identical Copies
Scan the downloaded photos for Picasa duplicates. This will help reducing the storage space and consume lesser bandwidth during the upload process. Keep in mind you could have several copies of the same photo with different names.
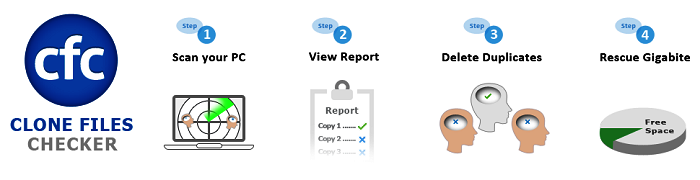
- Download Sorcim’s Clone Files Checker and install it. The software works for Windows 10, Windows 8, 7 and previous versions.
- Use the list box on left side to add folder containing all the Picasa photos that you have downloaded into your system.
- Choose “Custom” option, and check-up “Images” box for finding the picture duplicates only.
- Initiate the scan, wait till it completes.
- Delete all duplicates using Quick-Fix option > Older (file version) > Permanently Delete. Don’t worry; Clone Files Checker gives you the option to backup your photos in case you want to restore them anytime. Just use the “History” tab, click “Restore” button.
Step 4: Upload your Photos using Picasa
- Launch Picasa and direct it to the folder that contains the photos you’ve just downloaded.
- Once Picasa is done searching for the photos, it’ll display an option to upload photos to Google Photos. Make sure you are logged into using the same email address which you use for Picasa. Otherwise you could end up uploading your Picasa pictures into a different G Photos account.
- Click on that option and wait for the upload process to complete
That’s all, folks. Just by following these simple steps, you will be able to transfer your photos from Picasa to Google Photos with less chances of duplicate photos getting uploaded to the Google Photos cloud.
About Author
Eyden Haze
Eyden Haze is a digital marketer, a web designer and technology fanatic from Sydney, Australia. With over 7 years of experience in web industry, he has helped his clients to launch their marketing campaigns successfully. He also likes to explore various online tools and share that knowledge by writing useful blog posts.