
Whether you shoot with your smartphone or work as a professional photographer in a studio, you’ll need software to optimize, manage, and edit your digital photographs. It’s time to learn a few photo editing basics to put the final touches on your artistic vision. A simple editing tool can enhance the beauty of the photograph and will make it Instagram and Facebook-worthy.
Change Background of photo
The aesthetic sense of the image distinguishes the work of a professional photographer from that of an amateur. Many professional photographers add background to photo to give the image a more professional appearance. The background raises the photograph’s production value many times.
Imagine you’ve taken the perfect shot— you’ve inspected the location, the lighting is excellent, the style is on point — and then you see that a photobomber has crept into the background or an object in the foreground is drawing attention away from the main focal point of the photo. Here simply changing the photo’s background or removing unwanted objects from the background can uplift the photo appeal.
Cropping an image
If you clicked a photo with no reasonable frame, then in this situation, you may improve the image by cropping it. Cropping is one of the essential photo modification techniques. It is used to eliminate an undesired item or unnecessary noise from the perimeter of an image, modify its aspect ratio, or improve its overall composition.
Image Brightness and retouching
One of the most crucial aspects of photography is lighting. If you’re already editing an image, you may retouch it by adjusting the exposure, brightness, and contrast curves to enhance the lighting. When the brightness is increased, every pixel in the image becomes clear. While dimming the brightness, on the other hand, makes every pixel in the picture look darker. These adjustments can enhance the viewability of overly dark or bright parts in the image, but they will saturate the image if pushed too far.
Adjust White Balance
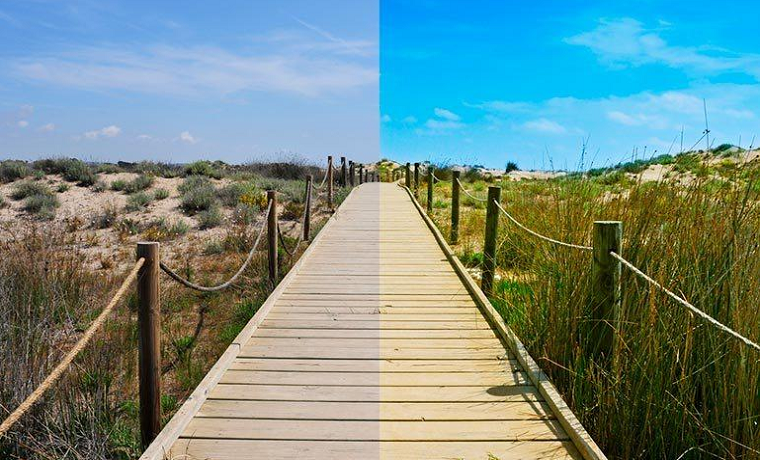
White balance is more about color levels rather than exposure levels. If your image’s general color tone is displeasing or odd, you may correct it by adjusting the white balance. Most editing software allows you to choose from preset settings such as “flash,” “daylight,” or “cloudy” to better calibrate the image for the lighting conditions at the time it was shot. Furthermore, many feature a “temperature” and a “tint” slider that you may play with to fine-tune the overall lighting cast on an image.
Adjust Color Vibrancy and Saturation
After you’ve changed the white balance, use the saturation and vibrancy settings to refine the color in your photographs. The difference is subtle: increasing vibrancy improves color intensity in neutral color tones while maintaining color intensity in brighter hues. Saturation increases the intensity of all colors in the frame. When bright colors pop, the shot takes on a more dramatic appearance.
Bottom Line
Digital photography has opened up a world of new possibilities. Today, picture editing software allows you to imitate all of the primary techniques employed in the past with a single click. Still, with a little more knowledge and experience, you may accomplish unlimited possibilities.
About Author
Founder
David Watson is the founder of DesignDrizzle and is a professional website designer for over 10 years. He has competence in creating visually appealing and user-friendly websites for all the clients. He likes to explore new and creative ideas for designing, photography effects and other inspirational subjects