

Angular is a front-end, open-source web application development framework. Based on TypeScript, it is led by the Angular Team at Google, along with a community comprising of individuals and corporations.
Let’s look at how to install Angular on Windows 10 and Ubuntu.
Before you begin, make sure you have:
- A user account with installation privileges
- Unlimited access to all mentioned web sites listed in this article
- Latest versions of Node JS and node package manager installed on your system.
(Nodejs for dev tooling and dev experience, however you do not need Node JS to run Angular and NPM will help to install and the libraries and other tools to support Angular development.)
System requirements:
For Windows users:
- Windows 10 OS
- 4 GB RAM
- 10 GB free space
For Ubuntu users:
- Ubuntu 16.04
- 4 GB RAM
- 10 GB free space
How to install Angular on Windows
We will be using the NPM to install the Angular app
Run the Node Package manager and run the install command shown below:
npm install -g @angular/cli
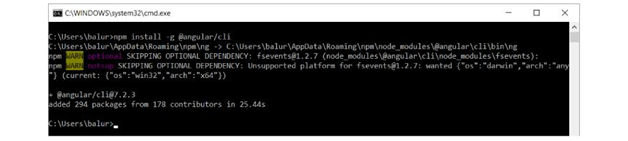
After successfully installing the app, you will see the above output (note: your app version may be different)
Testing the App
To test the Angular app you have just installed, run below command:
@angular/cli run ng version
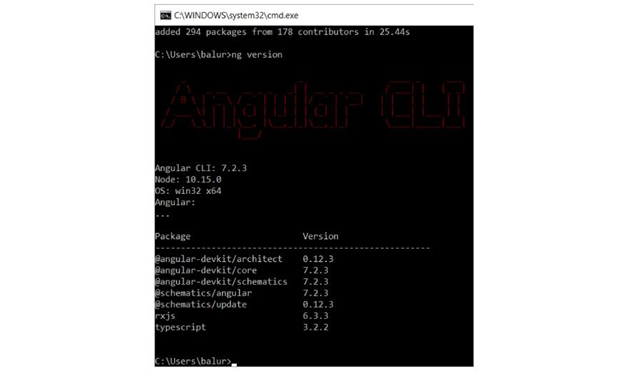
If you get the correct version of the app as the output, you have successfully installed the app.
How to install Angular on Ubuntu
The installation process is quite similar to that in the MacOS and it begins with running the Node package manager
Run the Node Package manager and run the install command shown below:
npm install -g @angular/cli

If you get the installation right, you should be getting the above output (note: its might not look exactly the same as the app versions may be different)
Testing the app
To test the Angular app you have just installed, run the command below:
ng version
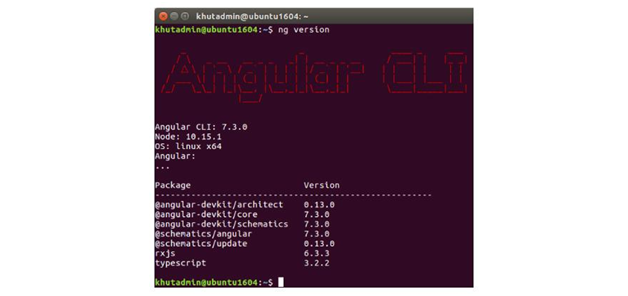
If you get the correct version of the app as the output, you have successfully installed the app.
Running the application (Hello World)
Step 1: Create the Project using theng new command
For windows:

For Ubuntu:
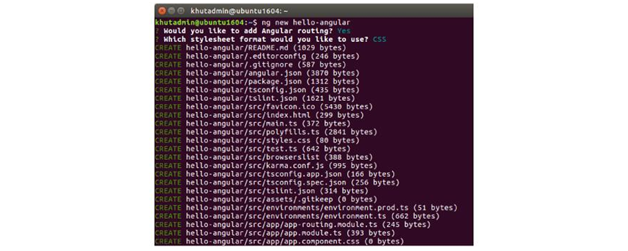
Where ‘hello’ is the name of the folder that you want to create for the project. The folder will contain all the files as well as sets up all the necessary libraries within it. It also makes the Angular project ready to be executed without any additional configuration
Step 2:
Once the project is created, open the project directory and run application using npm start command as shown below:
Windows:

Ubuntu:

The ng serve-o command starts the webpack development server. This in turn will perform all the build process and opens a browser window and loads the application url which, by default, is run at http://localhost:4200/. It should open a window as shown below:

Step 3: Making changes
The Angularcli comes with great tooling and one of the productive features is webpack hot reloading, which makes real time changes and will save lot of time by getting rid of redeploying and reloading the project to see the changes.
Let’s see how the real time changes can be made using the app and also go through some of the features while we’re at it.
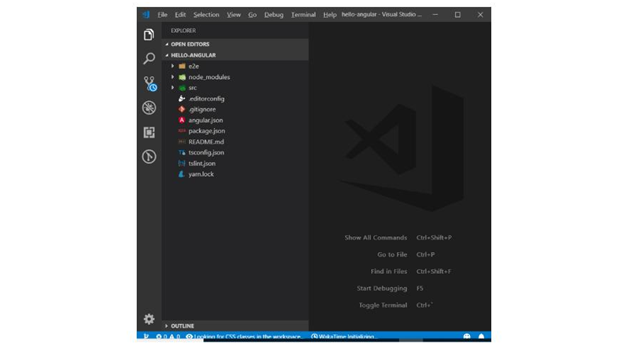
Open the project which was created in previous step in any JS editor (the editor being used in the screenshot is the vscode editor). It also shows you the the other folders created by the app on the explorer section on the left side
- e2e: All the end to end testing source and configuration codes are stored here. Your efforts of writing end to end testing automation code can be found in this folder.
- node_modules: Managed by package manager (npm) here are all of your project library dependencies. Do not modify any files here, as the changes made cannot be guaranteed once you update or install any other library.
- src: All your Angular development efforts are stored in this folder.
Let’s look a little more at all the folders in src:
- app contains all your source code
- assets contain all the static assets
- environments contain the per environment configuration file which holds the settings to be used for dev/test and prod environments
The main.ts is the starting file of this project where the execution on your code starts. Let’s try making a few changes to it and see how it reflects on the file opened in the browser. Edit the existing code with the new ones as shown in below screenshot.
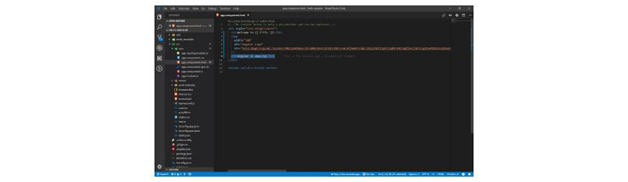
Save the file and switch back to browser to see the changes that were made.
The new changes will be visible immediately on the browser.

Uninstalling Angular
You can uninstall any library or tool setup via the Node package manager.
On command prompt run npm uninstall -g @angular/cli
That it, you would have successfully uninstalled Angular and all its components.
About Author
Founder
David Watson is the founder of DesignDrizzle and is a professional website designer for over 10 years. He has competence in creating visually appealing and user-friendly websites for all the clients. He likes to explore new and creative ideas for designing, photography effects and other inspirational subjects