
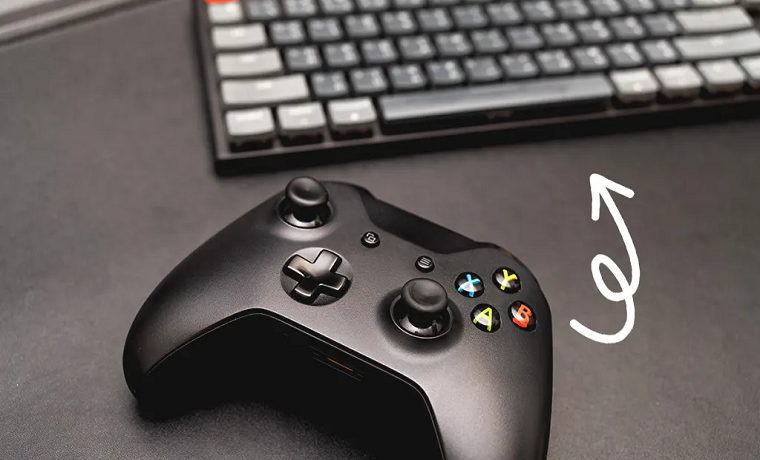
A controller can make PC gaming more comfortable, but not every game offers the right button layout out of the box. Some games have limited controller support, while others simply use a control scheme that does not feel natural. In these situations, controller remapping can give you much more control over how your gamepad works.
Remapping allows you to change what individual buttons, sticks, and triggers do. Depending on the software you use, you can also turn controller inputs into keyboard keys, mouse buttons, or mouse movement.
In this guide, we will explain how to remap a controller on PC, from connecting your gamepad to creating and testing a custom configuration.
What Does Controller Remapping Mean on PC?
Controller remapping means changing the default actions assigned to the buttons and other inputs on a gamepad.
For example, imagine that a game uses the A button for jumping, but you would rather use the right bumper. With remapping, you can assign the jump action to the button that feels more comfortable.
There are several types of controller remapping:
-
Controller to controller: one controller button is assigned to another controller input.
-
Controller to keyboard: pressing a controller button sends a keyboard input such as Space, Shift, or E.
-
Controller to mouse: a controller button can act as a mouse button, while an analog stick can be configured for mouse movement.
This can be particularly useful when a game does not properly support your controller. Instead of relying on the game’s native controls, you can create your own input layout.
A dedicated controller mapping software can also make it possible to save different layouts, combine controller and keyboard inputs, and apply specific configurations to individual games.
What You Need to Remap a Controller on PC
Before creating a custom controller layout, you only need a few basic things.
A Compatible Controller
You can use many common gamepads, including Xbox and PlayStation controllers, as well as other supported devices.
Depending on the controller, you can connect it to your PC using:
-
USB;
-
Bluetooth;
-
a compatible wireless adapter.
The exact connection method depends on the model of your controller.
A Windows PC
Controller mapping applications are generally designed for specific operating systems. Before installing any software, check its current system requirements to make sure your PC is supported.
For reWASD, for example, the software is designed for 64-bit versions of Windows.
Controller Mapping Software
Windows and individual games provide some controller configuration options, but dedicated mapping software can offer considerably more flexibility.
Instead of configuring every game separately, you can create custom profiles and mappings in one place. You can then adjust the layout whenever you need to.
How to Remap Controller on PC with reWASD
The basic process is straightforward: connect your controller, create a configuration, assign new actions, apply the changes, and test them in your game.
Step 1: Download and Install reWASD
Start by downloading reWASD from its official website.
Install the application on your PC and launch it. If you are using the software for the first time, you can set up an account and explore the available features.
The software also offers a 7-day trial, which allows users to test its functionality before deciding whether it fits their needs.
Step 2: Connect Your Controller
Connect your controller to the computer using USB, Bluetooth, or another supported connection method.
Before opening your game, make sure Windows recognizes the controller. If the device does not appear correctly, solve the connection issue first.
Once the controller is connected, open reWASD. Your device should appear in the application, allowing you to select it and start creating a custom setup.
Step 3: Create a Profile and Configuration
The next step is to create a configuration for your controller.
It is often useful to create a separate configuration for each game. Different genres can require completely different control schemes. An FPS game, for example, may benefit from a layout designed around quick aiming and movement, while a racing game may require a different approach.
Keeping configurations separate also makes it easier to return to a familiar setup later.
Step 4: Choose the Button You Want to Remap
After selecting your controller, you will see its inputs in the application.
Select the button you want to change and open its mapping options. Depending on the controller and the type of input you want to create, you can assign different actions to that button.
You can also use the physical controller to identify an input quickly rather than searching for it manually in the interface.
Step 5: Assign a New Action
Now you can decide what the selected button should do.
For example, you could create mappings such as:
-
A → Space
-
B → Escape
-
Right bumper → E
-
Controller button → mouse click
This is especially useful for games that primarily expect keyboard and mouse input.
You can also combine different input types in one configuration. A gamepad can handle movement and some actions while keyboard or mouse inputs are assigned to other controls.
For example, you could use the left stick for WASD-style movement while assigning individual controller buttons to specific keyboard commands.
Step 6: Remap Sticks and Triggers
Buttons are only part of the controller. Analog sticks and triggers can also be customized.
For example, you may want to adjust how quickly an analog stick reaches its maximum input or compensate for a small amount of unwanted movement.
This is where settings such as deadzones and response curves become useful.
A deadzone determines how much an analog stick needs to move before the input is registered. If the deadzone is too small, minor physical movement may be interpreted as an input. If it is too large, the controller can feel less responsive.
A response curve changes how the controller translates physical stick movement into an output. Adjusting it can help you create a control scheme that feels more natural for a particular game.
Step 7: Apply Your Configuration
Once your mappings are ready, review them before applying the configuration.
Check that:
-
the correct buttons have been selected;
-
keyboard mappings use the intended keys;
-
mouse mappings are assigned correctly;
-
stick and trigger settings are appropriate;
-
there are no obvious input conflicts.
Apply the configuration and launch your game.
Test the most important controls first. If something does not feel right, return to the configuration, make a small adjustment, and test it again.
How to Remap a Controller to Keyboard and Mouse
One of the most useful reasons to remap a controller is to make it work with games designed primarily around keyboard and mouse controls.
Map Controller Buttons to Keyboard Keys
A simple example could look like this:
|
Controller Input |
Keyboard Output |
|
A |
Space |
|
B |
Escape |
|
X |
E |
|
Y |
R |
|
Left Stick |
WASD |
This type of mapping can be useful when a game does not provide native controller support or when you simply prefer using a gamepad.
The exact layout should depend on the game. Start with the controls you use most often rather than trying to reproduce the entire keyboard immediately.
Map a Controller Stick to Mouse Movement
This can be helpful in games where the right stick would otherwise have no useful function because the game expects mouse input for camera control. You can adjust the sensitivity so that the virtual mouse movement matches the way you naturally move the stick. Finding the right sensitivity may take some experimentation, especially if you are switching between different types of games. You do not necessarily have to choose between a controller and keyboard/mouse. A custom configuration can combine different input types. For example: left stick for character movement; right stick for mouse movement; face buttons for keyboard commands; triggers for actions that need quick access; bumpers for additional shortcuts. This approach can be useful when a game has more commands than a standard controller layout can comfortably accommodate. There is rarely one perfect controller configuration for every game. A layout that works well in an action game may feel awkward in a strategy game. Racing games, RPGs, shooters, and simulation games can all benefit from different control schemes. Creating separate configurations solves this problem. You can make one setup for an FPS, another for an RPG, and another for a racing game. Each configuration can have its own button assignments, stick settings, shortcuts, and other options. reWASD also supports application detection, which can make it easier to associate configurations with specific games. Instead of manually changing the layout every time you launch a different title, the appropriate configuration can be associated with the relevant application. Once you are comfortable with basic mappings, you can experiment with more advanced features. One of the challenges of a controller is the limited number of physical buttons. A Shift Mode can effectively give existing buttons additional functions. For example, a button could perform one action normally and another action while a designated Shift button is held. This makes it possible to create more complex layouts without adding more physical controls. A single button can also be used for different actions depending on how it is pressed. Possible examples include: single press; double press; triple press; press and hold; release actions. This can provide additional commands while keeping the basic controller layout relatively simple. Some games require combinations of inputs rather than individual buttons. With shortcut or combo functionality, multiple inputs can be associated with a single controller action. This can be useful for repetitive sequences or situations where several commands need to be triggered together. As always, make sure that any custom shortcut is appropriate for the game you are playing and does not conflict with its normal controls. Virtual controller functionality can also help with compatibility. In some situations, a game may recognize one type of controller more reliably than another. A virtual controller can provide another way to present your inputs to the game. This can be particularly useful when you want to use a controller that is not natively supported by a particular title. Even a well-designed configuration can sometimes cause unexpected behavior. If your controller does not appear in the mapping software, start with the basics: Check the USB cable or wireless connection. Reconnect the controller. Check whether Windows detects the device. Try another USB port if you are using a wired connection. Restart the controller and the mapping application. If the controller works elsewhere but not in the mapping software, check the software’s supported devices and current requirements. If the configuration looks correct but the game does not respond, make sure the configuration has actually been applied. Then check which type of output you have assigned. A controller-to-controller mapping may behave differently from a controller-to-keyboard mapping. It is also worth checking whether the game is receiving the original controller input at the same time as the emulated input. Double input happens when a game receives both the original controller signal and a remapped signal. For example, pressing one physical button could cause the game to see both the original gamepad action and a keyboard command. This can lead to menus moving twice, characters performing two actions, or other unexpected behavior. If you encounter double input, check the configuration and make sure the input being sent to the game is the one you actually intend to use. You may need to adjust the original controller mappings or the output configuration. Before considering a new setup, go through a quick checklist. Buttons Make sure every important button performs the intended action. Sticks Check movement in different directions and make sure there is no unwanted input when the stick is released. Triggers Test both partial and full trigger movement if the game uses analog trigger input. Keyboard mappings If you have mapped controller inputs to keyboard keys, verify that each command produces the expected result. Mouse controls Check sensitivity and movement speed if you are using an analog stick as a mouse. Game input Finally, test everything inside the actual game. A configuration can appear correct in the mapping software but still feel different once you start playing. Save the configuration once you are satisfied with the result. Good controller remapping is usually about making small, purposeful changes rather than changing every control at once. Start with the buttons that cause the most problems. Once those feel comfortable, experiment with additional mappings. A few useful principles can make the process easier: Create separate configurations for different games. Keep frequently used actions on easily accessible buttons. Avoid overly complicated layouts unless you actually need them. Adjust deadzones when necessary rather than changing them without a reason. Use additional layers or Shift functions when you need more commands. Test one change at a time. Save configurations that work well so you can return to them later. The best controller layout is ultimately the one that feels natural to you. Remapping can turn a standard gamepad into a much more flexible input device. Whether you want to change a few buttons, use a controller with a game that lacks native support, or build a completely customized keyboard-and-mouse layout, the right mapping software can make the process considerably easier. The key is to start with a simple configuration, test it in your game, and then gradually add more advanced features as needed. If you want to create custom controller layouts, combine gamepad and keyboard/mouse inputs, and maintain different configurations for different games,reWASD is one option worth exploring.Combine Controller, Keyboard and Mouse Inputs
How to Create Different Controller Layouts for Different Games
Advanced Controller Remapping Options
Shift Mode
Multi-Press Actions
Shortcuts and Combos
Virtual Controllers
Common Problems When Remapping a Controller on PC
The PC Doesn’t Detect the Controller
The Game Doesn’t Respond to the New Mapping
Double Input After Remapping
How to Test Your New Controller Configuration
Final Tips for Better Controller Mapping
Start Remapping Your Controller on PC
About Author

Founder
David Watson is the founder of DesignDrizzle and is a professional website designer for over 10 years. He has competence in creating visually appealing and user-friendly websites for all the clients. He likes to explore new and creative ideas for designing, photography effects and other inspirational subjects