
Creating a website can be overwhelming when you see just how much there is to do. If you’ve done it before and are familiar with some of the page building tools available, or if you have some coding experience and feel comfortable with customizations, the process may not seem so daunting.
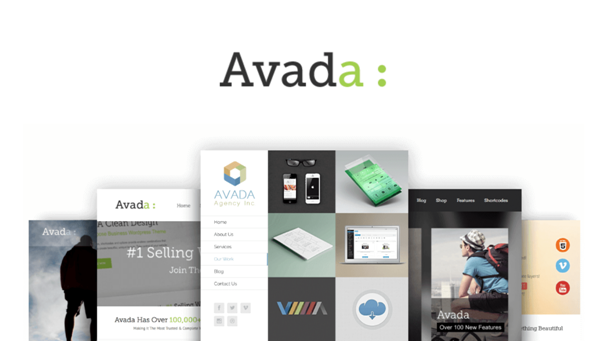
However, if you’re just starting out or have a time constraint, you may prefer to use a pre-made website or template. Thankfully, some themes have demos that you can implement with a single click, automatically setting up a functional framework within which you can write your content. The most popular of these themes is Avada, which has been one of the top themes on the WordPress market since its creation in 2012.
How Do Avada Demos Work?
Avada is one of the most flexible themes available, able to cater to photography portfolios, fashion blogs, online stores, corporate websites, service businesses, and countless other types of websites. With so many possibilities, it’s only natural that the options may overwhelm you when you’re first getting started.
One of the features that has made Avada so popular throughout the years, however, is that it offers over 50 demos that can be used to instantaneously set the theme for your website. These demos are essentially “child themes” that have already been built and coded using Avada’s tools and can be loaded onto your site so that all you have left to do is personalize it to fit your content.
Getting Started
First and foremost, you’ll need to buy Avada from https://avada.theme-fusion.com/ (which is $60 for a Regular License). Once you’ve made your purchase, you’ll be given the option to download the Avada file.
You’ll want to click on the “Installable WordPress file only” link and download that, then go to your WordPress account.
From your Dashboard, scroll over Appearance and click on Themes and you’ll see the option to “Add New” at the top. This is where you can upload the Avada.zip file, then “Install” and “Activate.”
Once you’re done installing the theme itself, it’s recommended to add the plugins that are meant to go with the theme itself. If you click on Avada from the top of the menu on the left, you should see a button that says “Go Install Plugin.” Clicking on that will allow you to install Fusion Core Plugins, which will give you everything you need to customize your theme once it’s set up.
Selecting a Demo
After you’ve installed everything you need up to this point, click on Avada from the leftmost menu. You should see a tab toward the center that says “Demos” or “Install Demos,” and clicking on that will allow you to sort through the 50+ demos Avada offers.
Always preview the demos before actually making a decision so that you can see what navigation, page format, and general visuals will be like. You can still uninstall a demo if you change your mind, but it could be cumbersome and time-consuming if you wind up doing that more than once. Preview each one that looks like it could be a winner and click around inside the demo to get a feel for what you like, what you might want to change, and what you’re altogether uninterested in.
Once you’ve found a demo that either feels perfect or would require the least amount of edits in order to make it suitable for your content, go ahead and click that Import button!
Importing the Demo
Selecting a demo to import will give you a couple of different checklists. Firstly, it’ll tell you which plugins are required in order to take full advantage of the demo contact. These may include plugins like WooCommerce, the Fusion Core Plugins we mentioned earlier in this article, Contact Form builders, and other types of helpful add-ons that ultimately shouldn’t add too much weight to your site overall. Any of the Avada demos may have additional plugins required, and many may be ones you’re already familiar with.
In addition to plugins, it’ll also give you a checklist of content items that can be imported with the Demo. You can select “All” to simply bring them all over, or you can select and unselect them as you prefer. This list comprises of items like:
- Posts
- Pages
- Products
- Images
- Sliders
- Theme Options
- Widgets
If you’ve gotten to this point and have decided against the Demo you originally chose, this is also where you’ll see the option to Uninstall the Demo under “Remove Content.”
Ready? Import!
Clicking that blue Import button at the bottom of the popup that gave you the above checklists will initiate one last popup, which will give you information on the different requirements the Demo has. It will tell you how much memory you need to have available and which plugins need to be activated in order for the import to be successful. Selecting “OK” will initiate the installation, and then you’ll click “Done” to complete the process.
Finishing Up
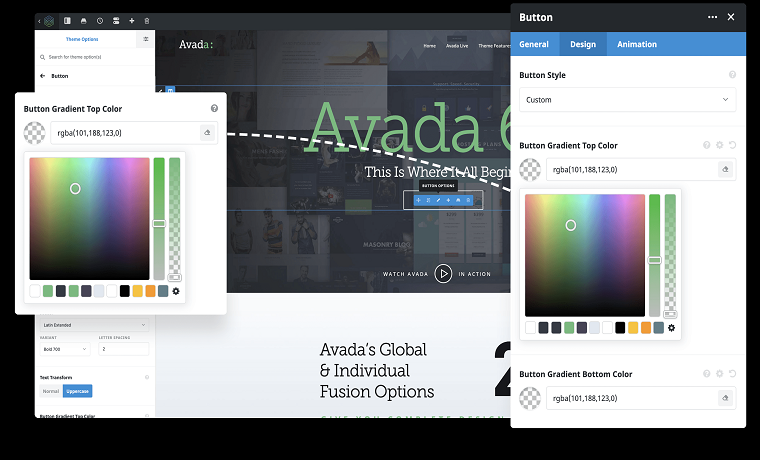
Now that you’ve successfully installed the Demo, you can go up to your Avada tab once more and it should give you a button that lists the actual Demo name. Click on that, and you’ll be taken to the Demo as implemented on your website. From there, it’s a simple matter of altering the content, inputting your own images and text information, and otherwise turning it into your own unique website. Avada’s drag-and-drop page builders and intuitive design will help guide you through this part of the process.
Why Use a Demo Instead of a Regular Page-Builder?
By now, you probably know how easy it is to use Avada and it’s demos, but if you’re still not convinced you might want to check out this full article on collectiveray.com.
Demos take out all of the guesswork in designing a webpage, giving you a true WYSIWYG (what you see is what you get) experience and minimizing the amount of time you have to spend on building the actual page theme itself. This allows you to focus your energy on whatever needs to be done to make the website unique and the content itself.
Because of how streamlined Avada Demos makes the site-building process, this is ideal for beginners and/or those with a time constraint that won’t allow them to sit down and build their website block by block, widget by widget. All in all, the biggest advantage is the time and effort saved without sacrificing the visual outcome, as every last one of the Avada Demos are beautifully made and highly functional.
About Author
Founder
David Watson is the founder of DesignDrizzle and is a professional website designer for over 10 years. He has competence in creating visually appealing and user-friendly websites for all the clients. He likes to explore new and creative ideas for designing, photography effects and other inspirational subjects